 |
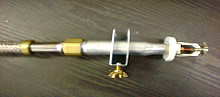
Install Sprinkler & Fittings on Reducer Slide reducer bracket onto reducer.
Install inner escutcheon plate and sprinkler head on reducer.
|
 |
Joint the Nipple.
Prepare 25mm inlet end of Nipple with usual jointing compound (e.g. hemp & soap) and install in range pipe outlet.
Note: Do NOT put hemp & soap or other compound on end of Nipple & Reducer which screw into Slip Nuts at each end of FlexDrop.
|
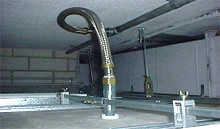 |
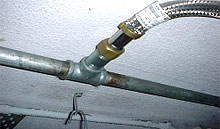
Bend Tube into Position.
Bend FlexDrop tube into curve(s) as required in area where the sprinkler head will be located.
|
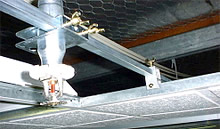 |
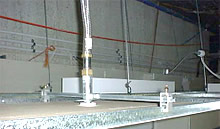
Position Support Bar & Fittings
Slide support bar through reducer bracket and through top of the two ceiling grid clamps. Position clamps on grid in relation to sprinkler head position and levels in centre of tile/board.
Loosely tighten all securing bolts.
|
 |
Check Fittings & Alignment
Once in correct position, firmly tighten all securing bolts and check both slip nuts are tightened.
Note: Do NOT over tighten Slip Nuts. They should only be hand tightened as excessive tightening force may damage 'O' ring and cause leakage
|


 Check Point